
Welcome to Cobuilder Training Portal
This guide shows you how to upload a new document in Cobuilder Supply, and which steps to follow to register it correctly.
How to do it
1
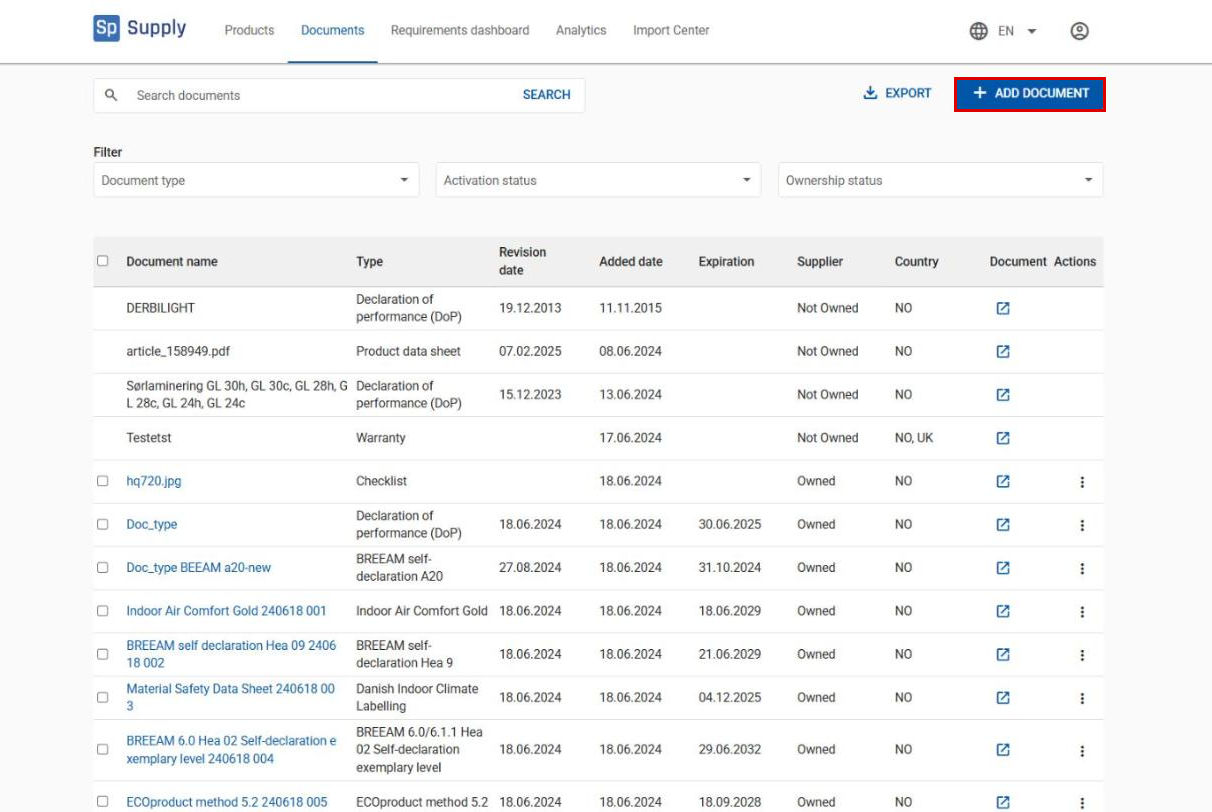
Go to Documents in the main menu and click Add document.
2
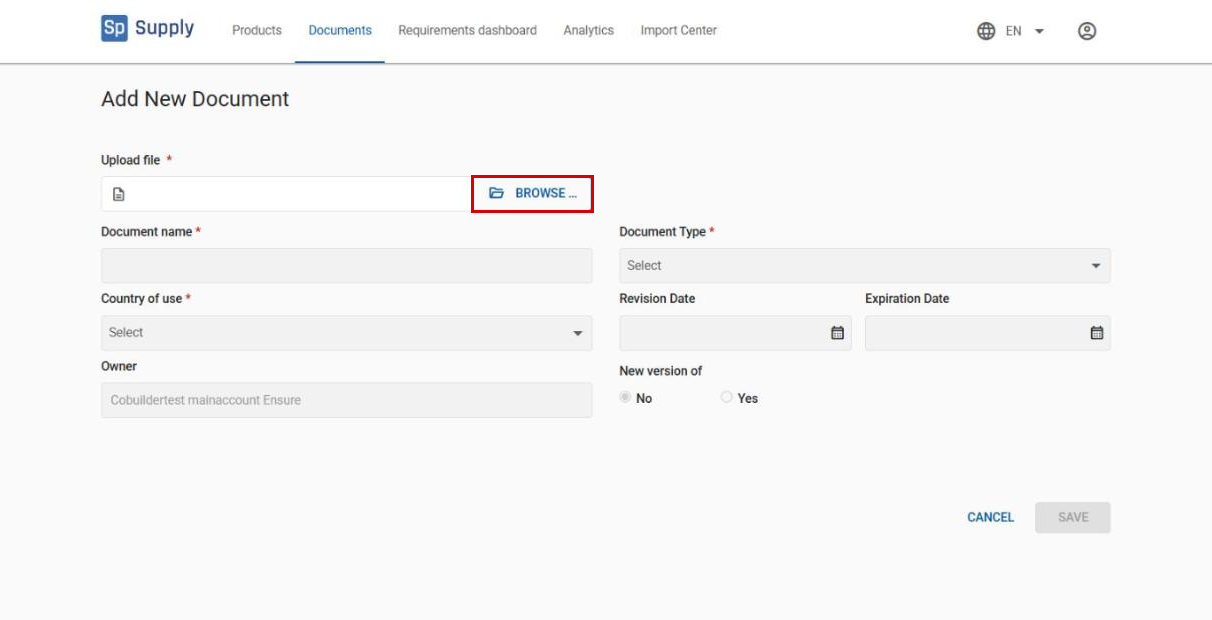
Click Browse to select the document on your computer and upload it.
3
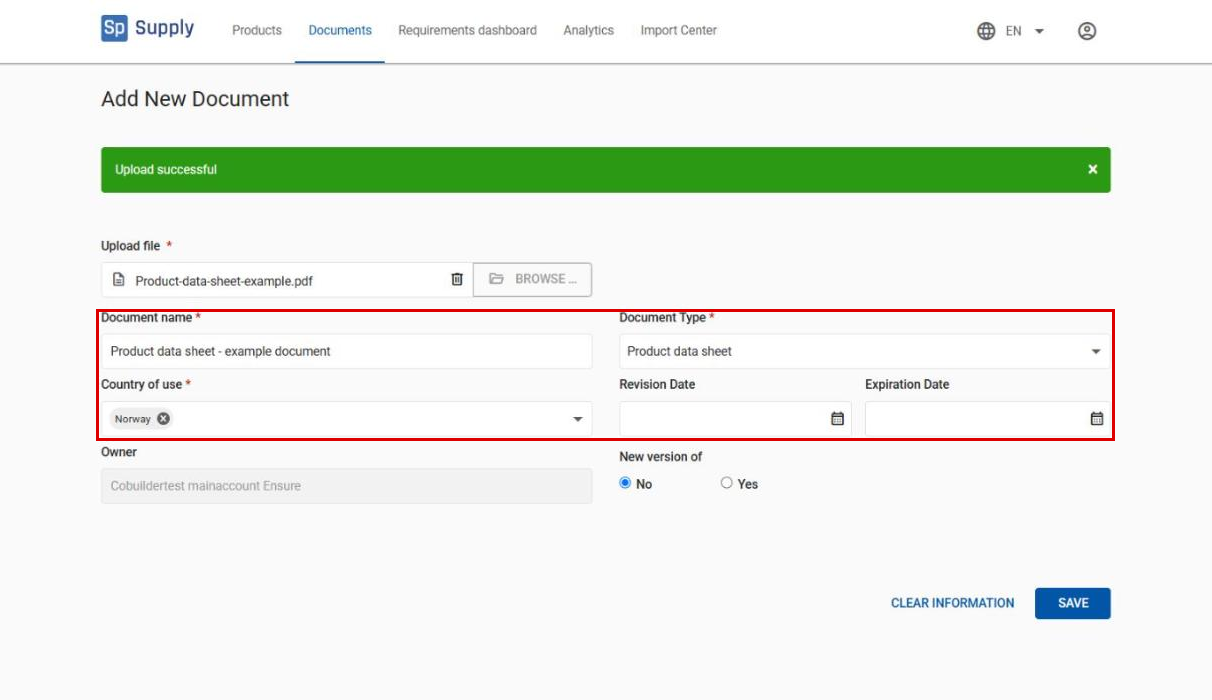
After uploading, register the information about the document:
- Document name – give the document a clear, descriptive title (required)
- Country of use – select the country where the document will be used (required)
- Document Type – select the document type from the list (required)
Other fields can be filled in as needed.
4
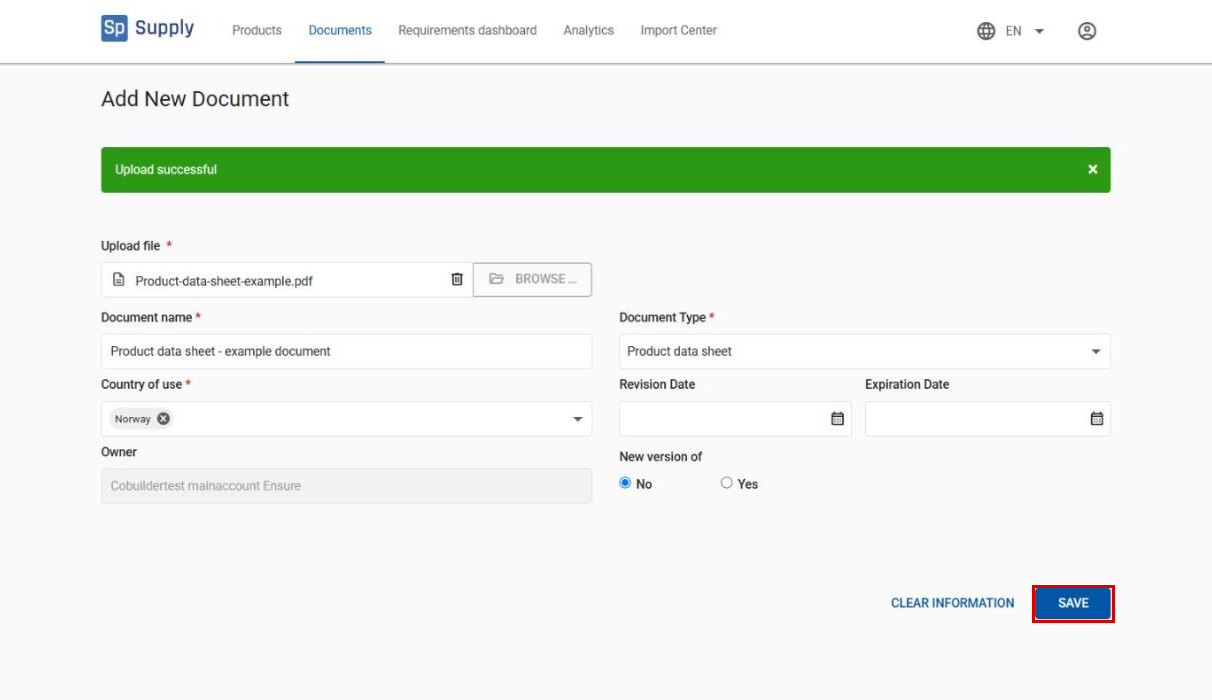
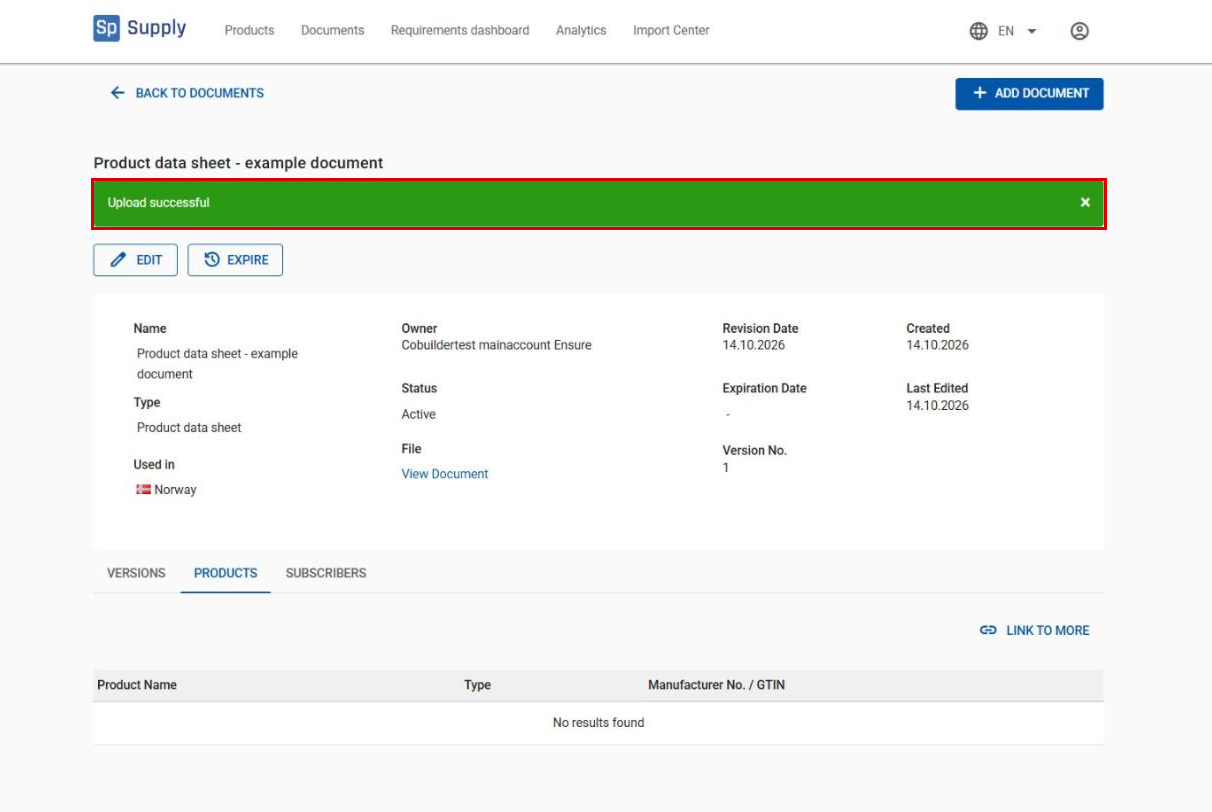
When all information is filled in, click Save. The document is now added to your document list, and its details page opens.
What happens if the document already exists?
There are different scenarios when you upload a document that already exists:
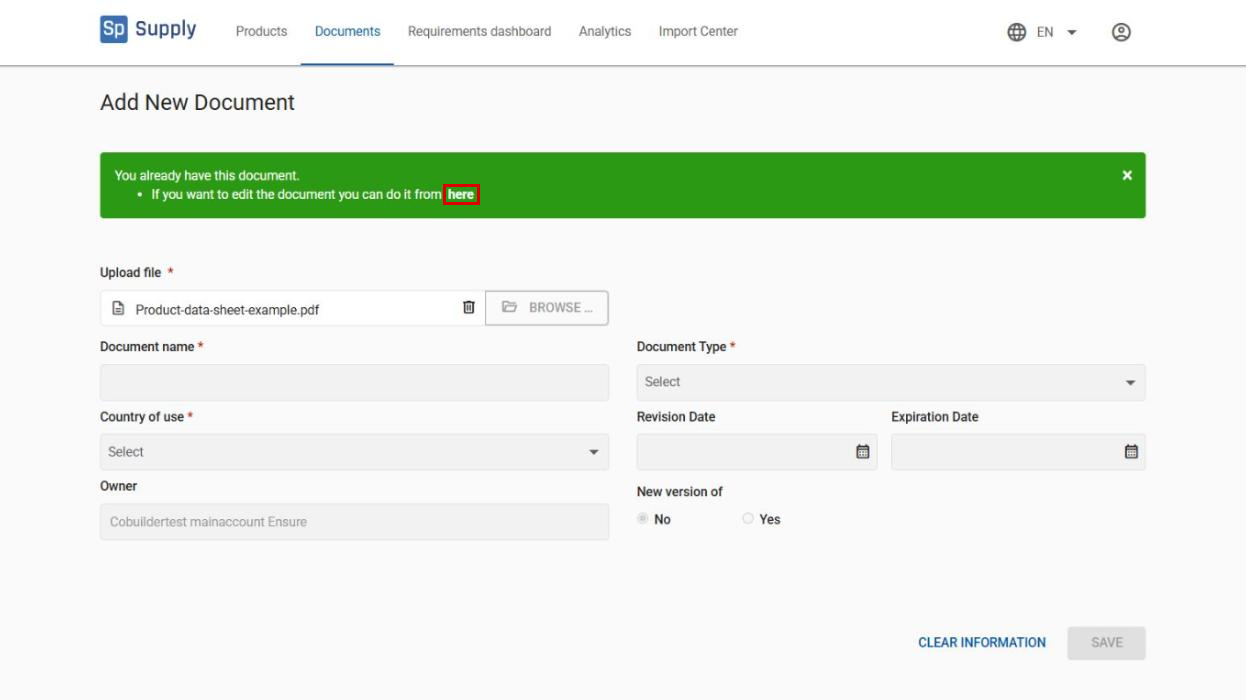
The document is already in your account
You get the message You already have this document. If you need to make changes, click here in the message to edit the document.
The document is owned by another user
You get a message that you have been given access to the document. The document is now shown in your list, but the ownership stays the same, and you only have read access.


