Welcome to Cobuilder Training Portal
Once you’ve created a project in Cobuilder Collaborate, add products to gather product documentation and track which requirements they meet.
Here’s how
1
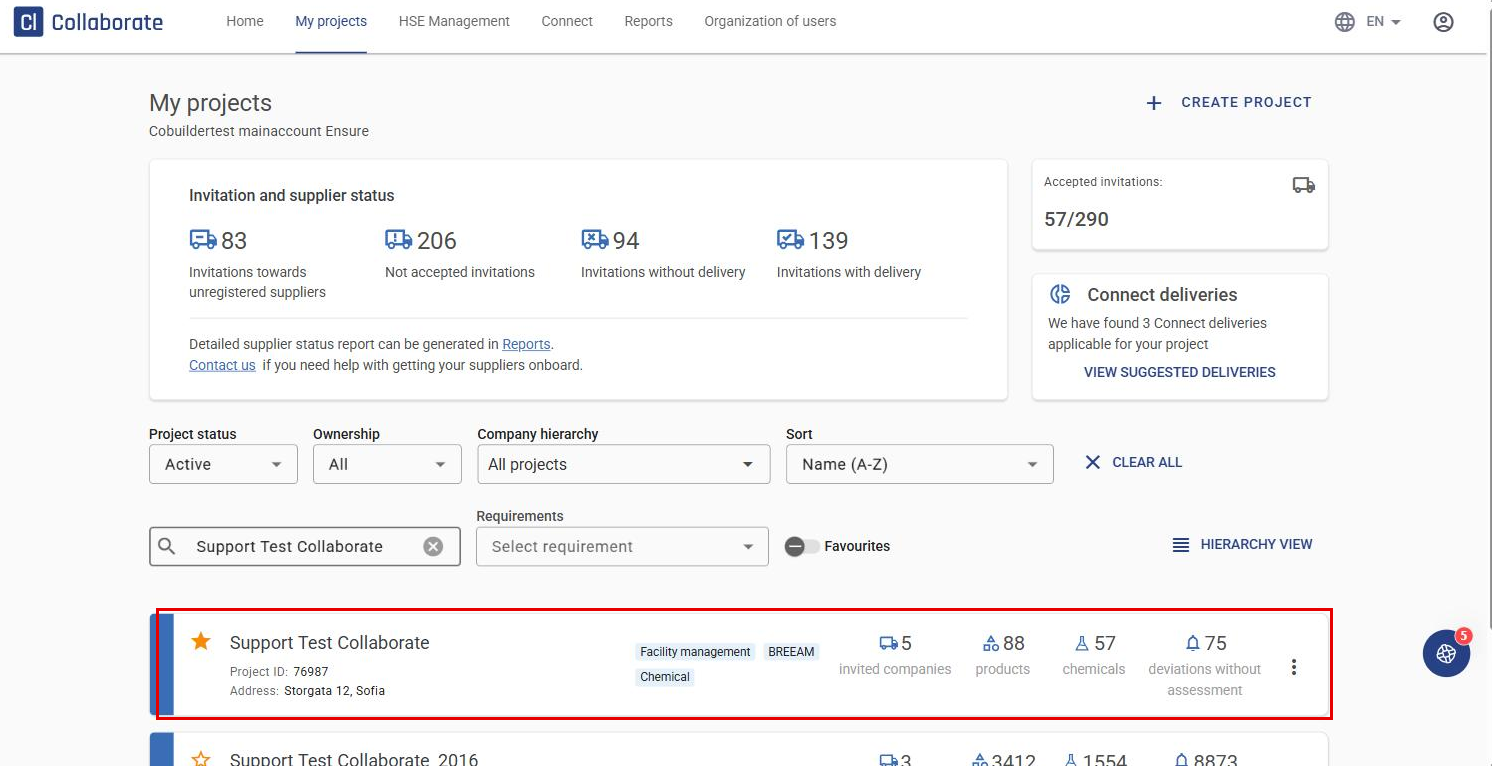
Go to My Projects, find your project, and click on it.
2
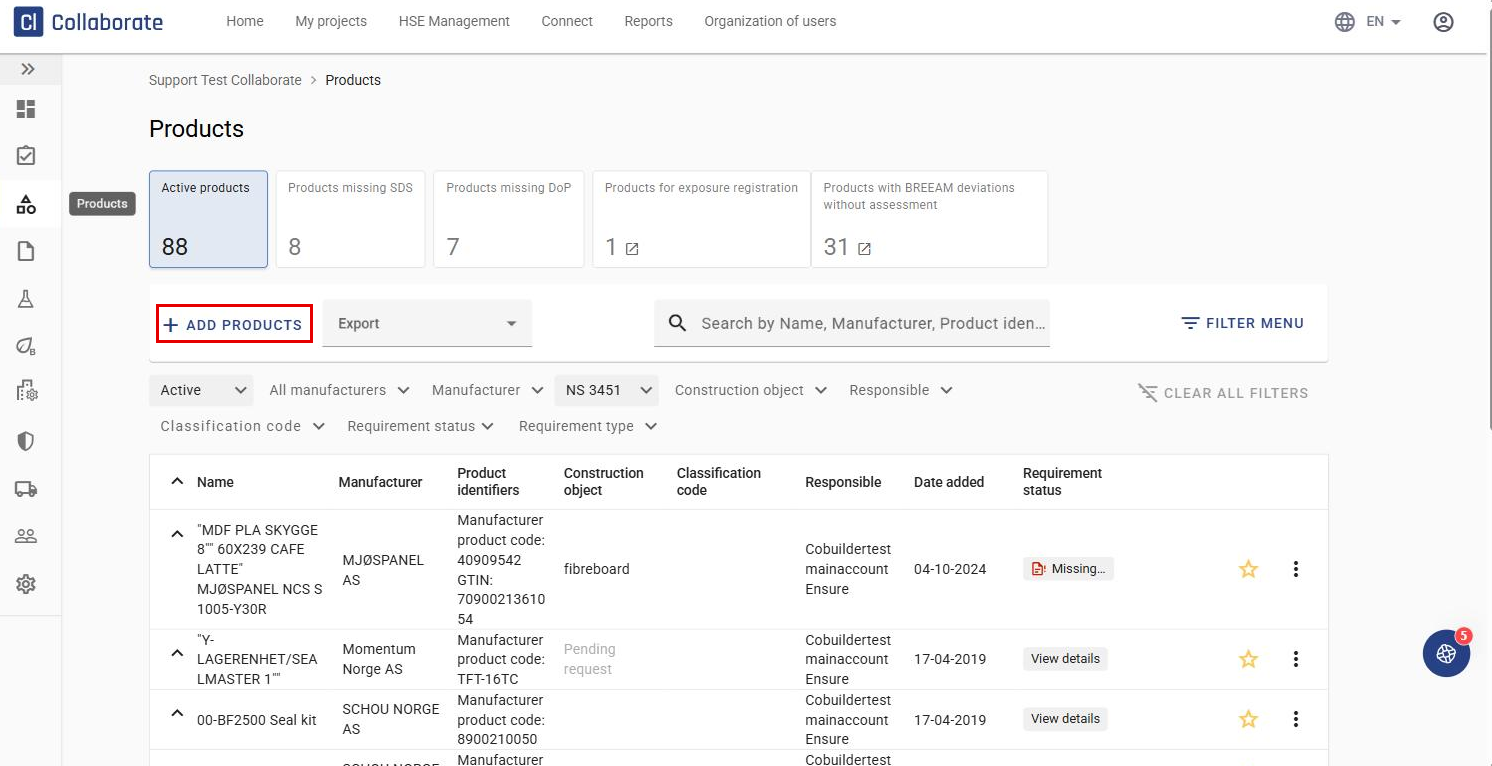
Go to Products.
3
Click Add products.
4
In the left field, search by product name, trade name (as written on the Safety Data Sheet), or product identifier (for example, article number or GTIN). Use the field on the right to search by manufacturer at the same time — the two fields combine into one search.
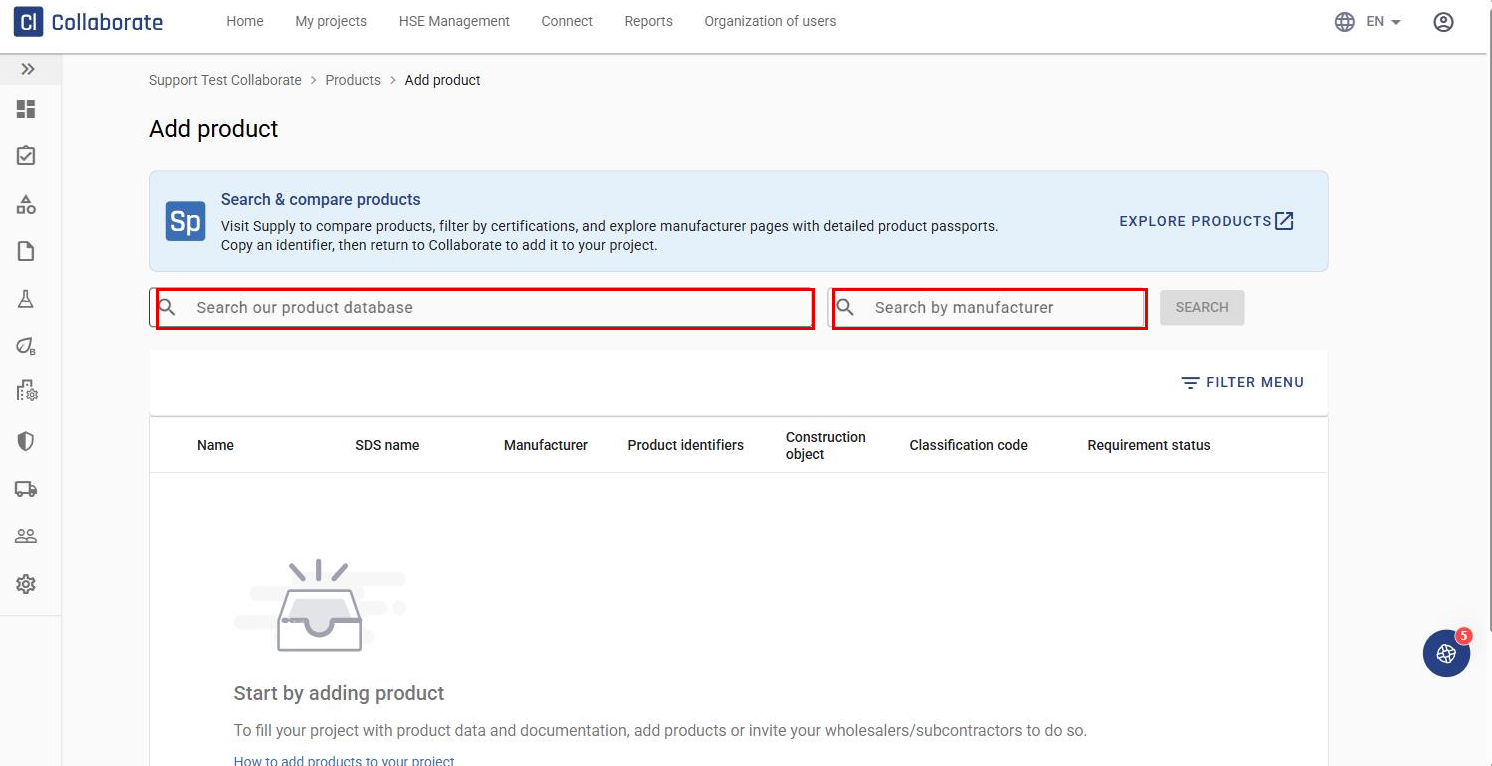
5
Narrow the results using the Filter Menu: Manufacturer, NS 3451, Classification code, Construction object, or Favorites only.
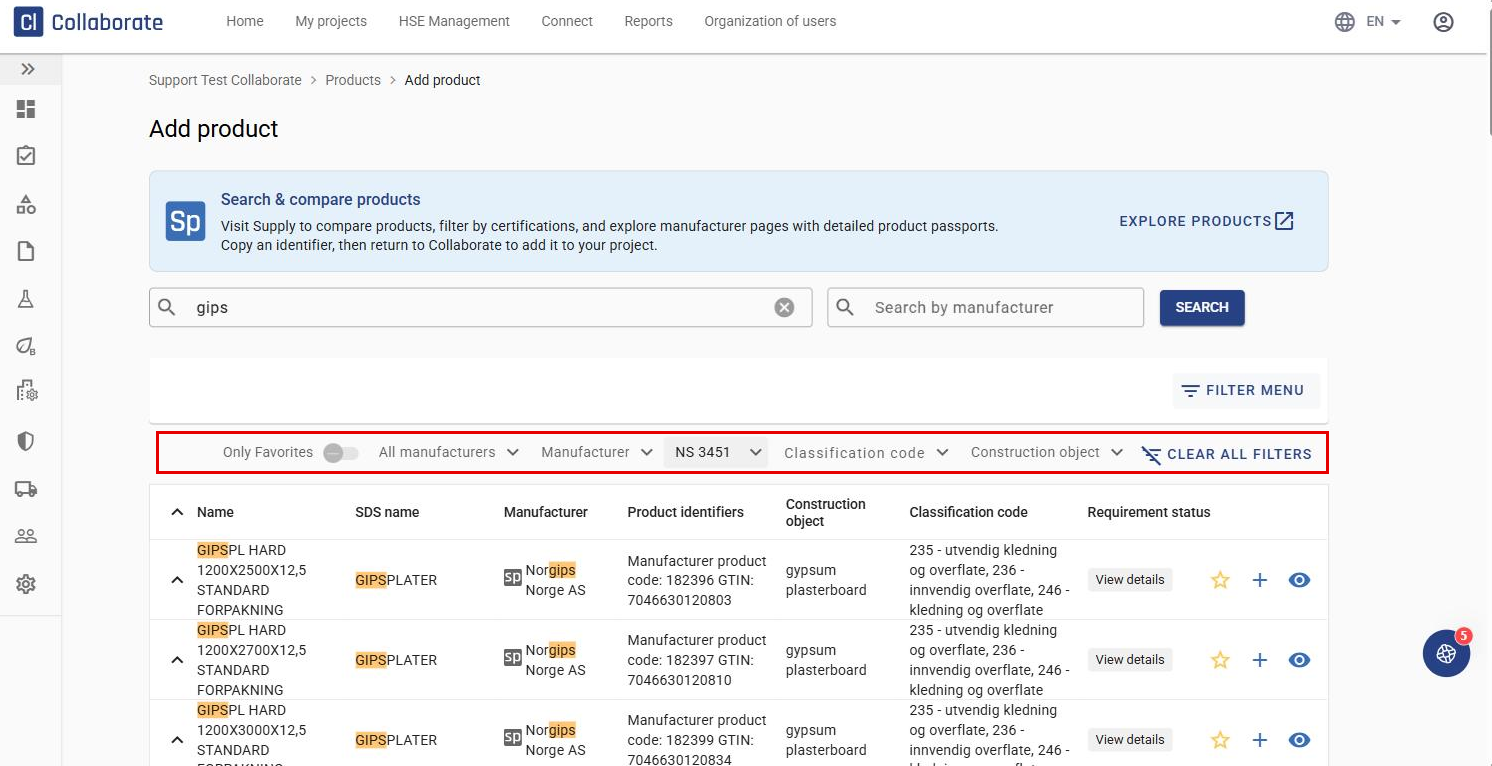
6
Click the plus icon next to a product to add it to the project. Products already added to the project appear greyed out in the results.
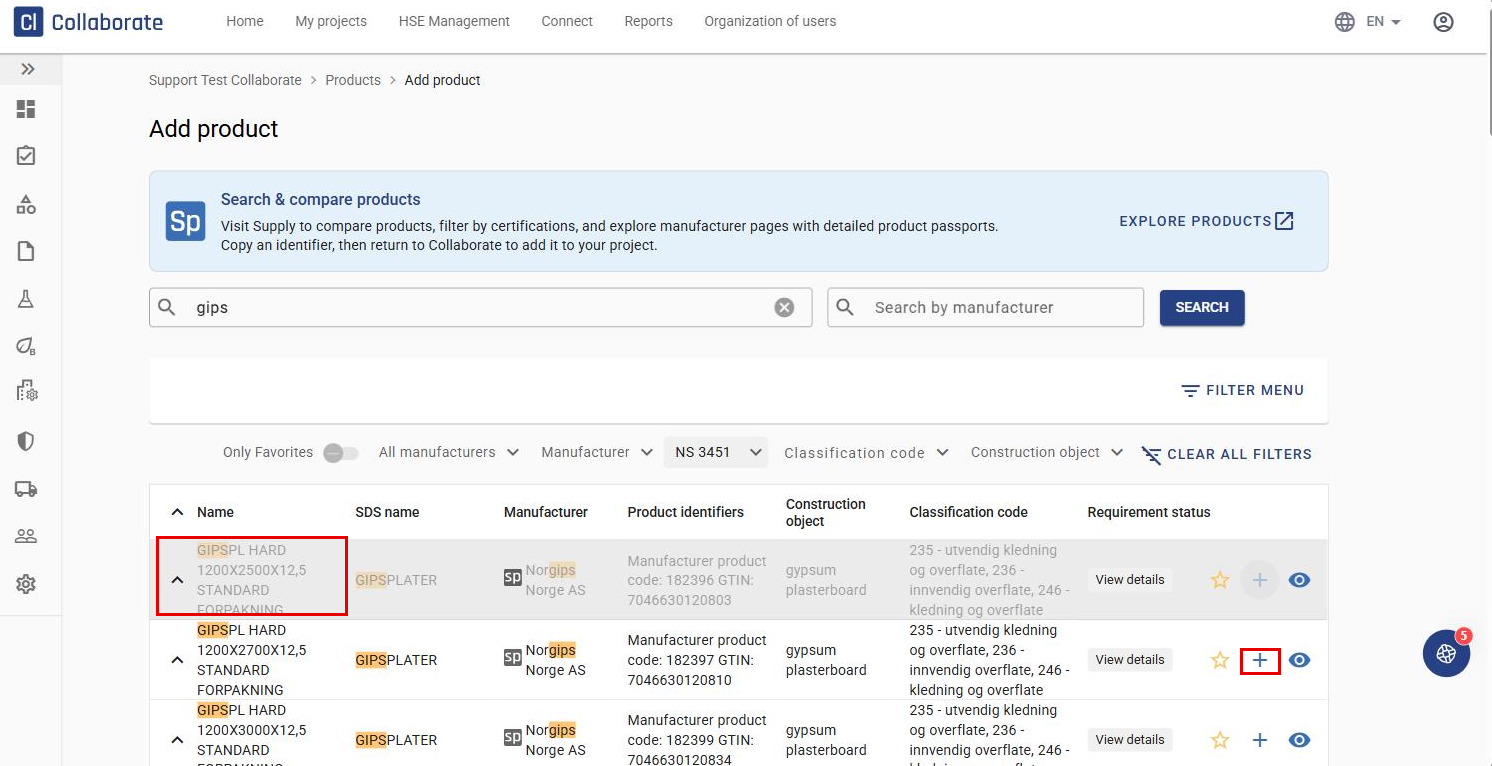
7
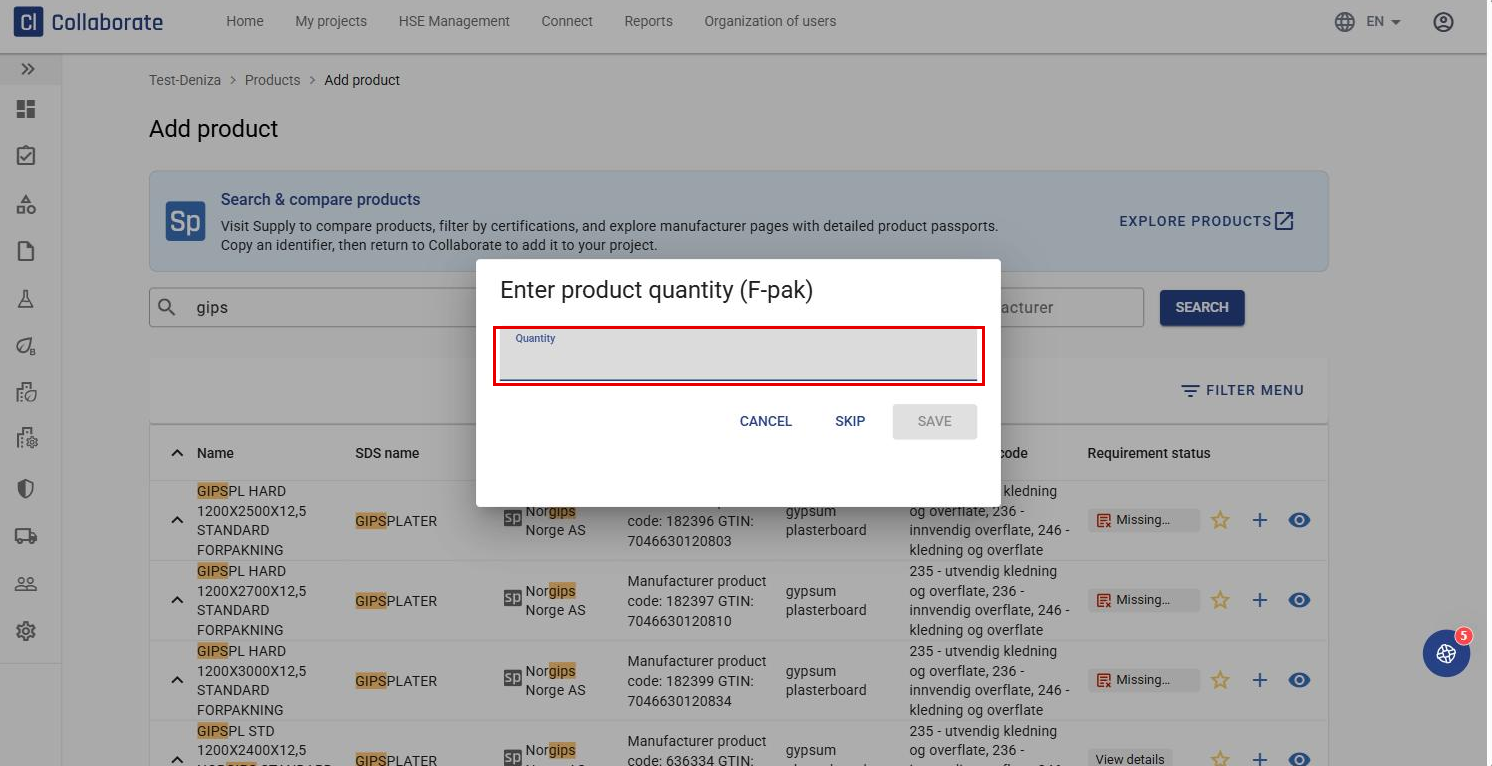
If the project has Sustainability reporting enabled, you can also enter the product’s quantity (F-pack) here. This is optional — you can add it later in the Sustainability reporting module instead.